This post will guide you on how to automatically change properties of all pictures in Excel using VBA code. How do I automatically change all pictures to move a size with cells in your worksheet with VBA macro code in excel.
You can quickly modify the properties of multiple pictures at once using VBA Macro, instead of changing them one by one. This can be a huge time saver if you have a large number of pictures in your Excel file that need to be modified.
By default, after you inserted a picture into worksheet, it will keep the default properties of move and don’t size with cells. And you need to change its properties to move and size with cells by manually in your worksheet.
Table of Contents
1. Automatically Change Properties of All Pictures
Let’s do the following steps to automatically change properties of all pictures:
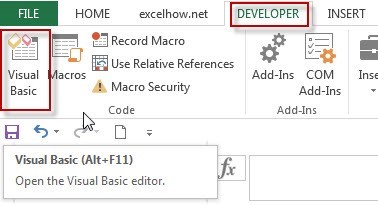
Step1: open your excel workbook and then click on “Visual Basic” command under DEVELOPER Tab, or just press “ALT+F11” shortcut.

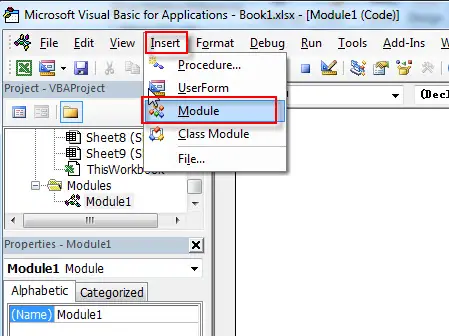
Step2: then the “Visual Basic Editor” window will appear.
Step3: click “Insert” ->”Module” to create a new module

Step4: paste the below VBA code into the code window. Then clicking “Save” button.
Sub AutoMoveAndSizeWithCells()
    Dim xPic As Picture
    For Each xPic In ActiveSheet.Pictures
        'Modify the picture properties here
        xPic.Placement = xlMoveAndSize
    Next
End Sub
Note: you can modify the code inside the loop to change other properties of the picture, like brightness, contrast, etc.
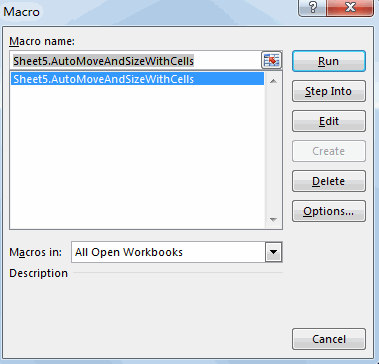
Step5: back to the current worksheet, then run the above excel macro. Click Run button.

You will see the all pictures are changed to move and size with cells automatically after running the above vba code.
2. Video: Automatically Change Properties of All Pictures
This video will show you how to use VBA code in Excel to automatically change properties of all pictures, allowing you to quickly modify multiple pictures at once.
Leave a Reply
You must be logged in to post a comment.