Contents:
Encrypt excel file | Protect workbook | Protect worksheet
How do I encrypt an excel file in excel 2013? How to encrypt excel workbook? How to encrypt an excel file with a password in Microsoft excel? This post will guide you how to encrypt excel file, protect workbook and protect worksheet in excel.
Table of Contents
Encrypt excel file
There are three kinds of encrypt way in excel as below:
- Password to open
- Password to modify
- Read-only recommended
“Password to open”, it means that while you opening a workbook, you need to input a password.
“Password to modify”, it means that if you want to modify the workbook, then you must input a password, or you just only can read it.
“Read-only recommended”, it means that you can read-only the excel workbook if you do not know the password.
Let’s see the below steps to encrypt excel file:
1# open an existing workbook or create a workbook
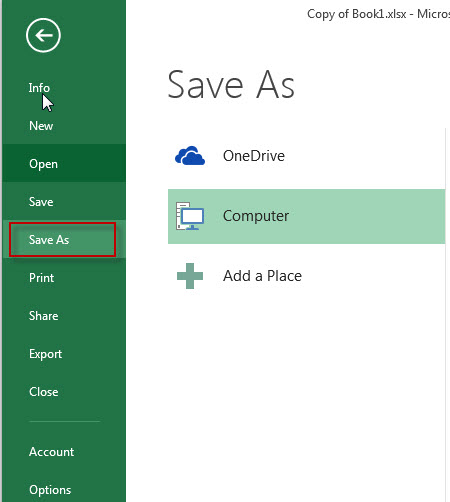
2# click “File” Tab, then click “Save As”
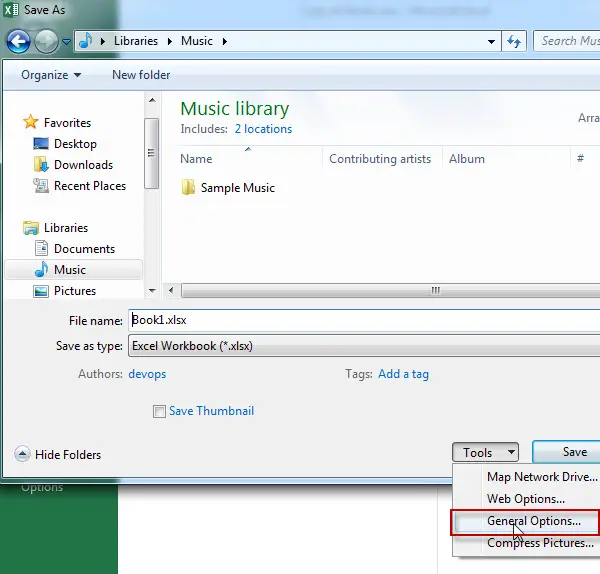
3# click “Tools” button, then click “General Options…”, the “General Options” window will appear.
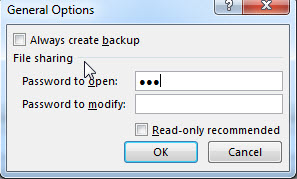
4# enter a password in “password to open” or “password to modify” box.
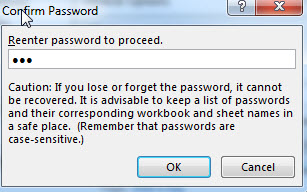
5# Reenter password to proceed. Click “ok” button, then click “save” button
6# try to reopen the above excel workbook, then you need to type password so that it can continue to open.
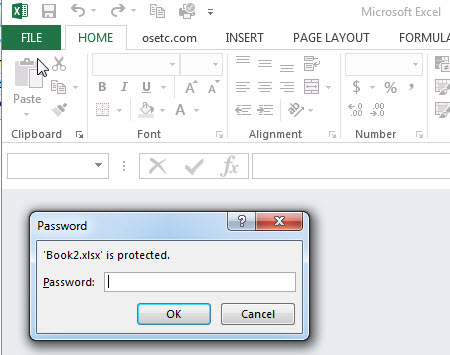
7# if you want to make your workbook with read-only, just checked “Read-only recommended” option in “general options”.
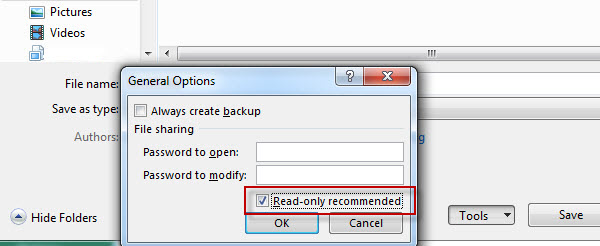
8# re-open excel file, one window will be pop up.

Protect workbook
The below steps will explain that how to protect the workbook structure and window in excel:
Protect structure-user is not able to do the following operation for the current workbook: Insert, Delete, Rename, Move or Copy, Hide, Unhide and set tab color.
Protect window-this option is only available in excel 2010 and earlier. If you checked “windows” option, the users is not able to moving, resizing or closing the current workbook window. And the protect windows option is unavailable in excel 2013 and later versions.
1# open a workbook or create a new workbook
2# On “REVIEW” Tab, click “Protect Workbook” on “Changes” group.
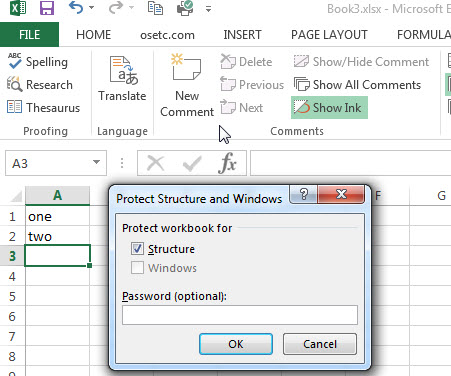
3# Enter a password in the Password box.
4# Retype the password to confirm it.
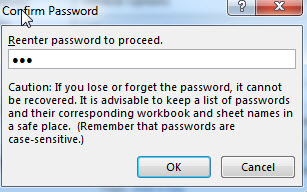
5# if you want to unprotect workbook, just click “protect workbook” again, then enter the password.

Protect worksheet
If you want to protect a worksheet to prevent users from changing, moving, or deleting data in a worksheet, you can lock the cells on your current excel worksheet and also you can protect the worksheet with a password. The below steps will explain that how to protect the worksheet:
1# on “REVIEW” tab, click “Protect Sheet”, then “protect sheet” window will appear.
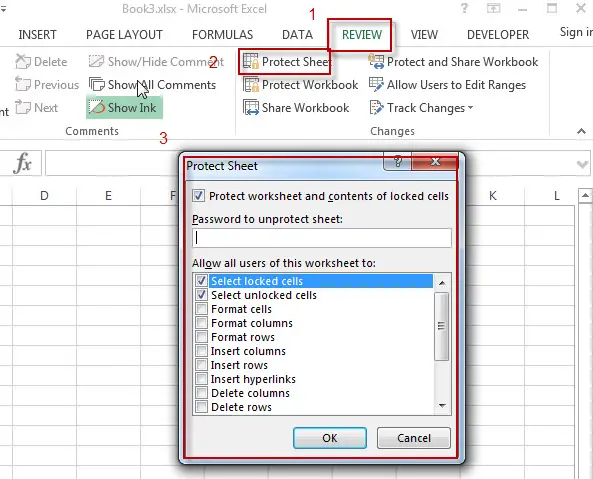
2# Reeter password to proceed.

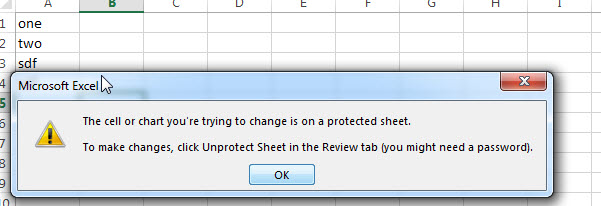
3# now try to modify worksheet data, and let’s see the result:
Leave a Reply
You must be logged in to post a comment.