Contents:
Ribbon Tabs | show or hide the ribbon | customize the ribbon | add ribbon tab and groups | rename ribbon tab | add ribbon command to custom group | reset ribbon tabs to default | Customize quick access toolbar on ribbon | Add developer tab to ribbon
The Ribbon is the strip of buttons and icons located above the work area. and it is organized into various tabs, such as: File, Home,Insert, Page Layout, Formulas, Data, Review, and View. while clicking on a tab, you will saw all of program’s features and commands.
This section will guide you how to customize/collapse/show/hide/reset/the Ribbon. you will also learn that how to add developer tab to ribbon and how to set quick access toolbar on ribbon.
Table of Contents
Ribbon Tabs
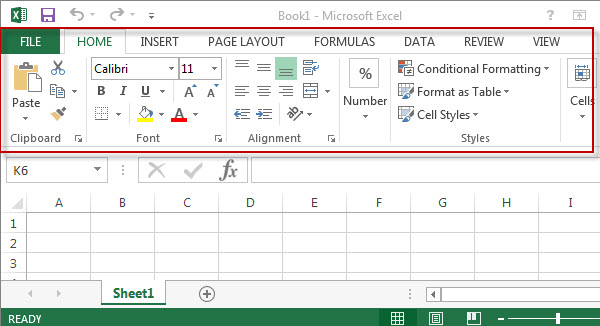
The following tabs are shown on the ribbon by default: File, Home, Insert, Page, Layout, Formulas, Data, Review and view. you will find the most basic and frequent features on Home tab.
The Home tab is the default tab in Microsoft excel. The below screenshot shows an example of the Ribbon Tabs and Home tab in excel 2013.
Show or Hide the Ribbon(Maximize or Minimize the Ribbon)
If you want to get more space on the screen, you can easily minimize or hide the ribbon by the following 4 ways:
#1 -To minimize the ribbon, just double-click on any of the tab names
#2 – Just press “Ctrl +F1” to hide or show the ribbon

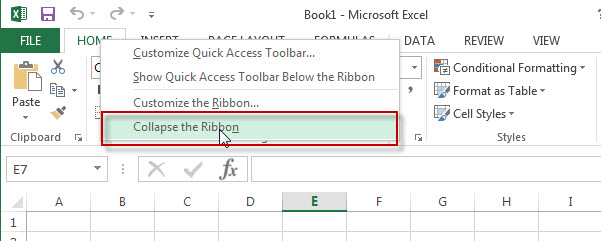
#3 – Right-click on any ribbon tab name, check “Collapse the Ribbon”
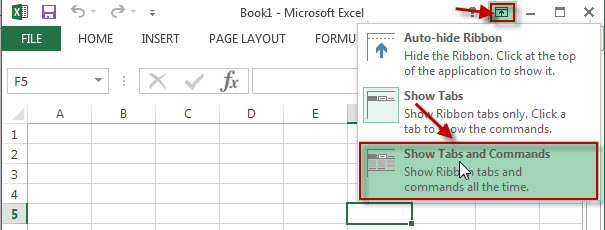
#4 – Click “Ribbon Display Options” icon on the top-right corner, then click “show Tabs”
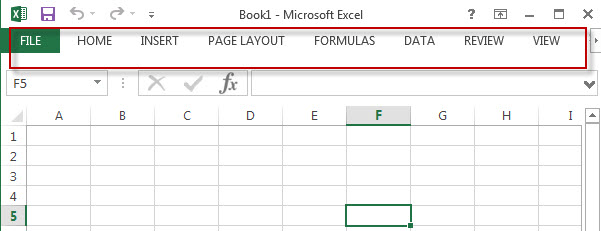
Let’s see the below minimized ribbon:
Conversely, To maximize the ribbon, also following the below 4 ways:
#1 – Double-click on any of the tab names(now the ribbon is minimized)
#2 – Press “Ctrl +F1” to show the ribbon again

#3 – Right-click on any ribbon tab name or anywere on the ribbon , un-check “Collapse the Ribbon”

#4 – Click “Ribbon Display Options” icon on the top-right corner, then click “show Tabs and Commands”

Customize The Ribbon
You can easily customize the ribbon in excel , such as : add, remove, rename, reorder, reset ribbon tabs, groups, commands.
1. Add Ribbon tab and groups
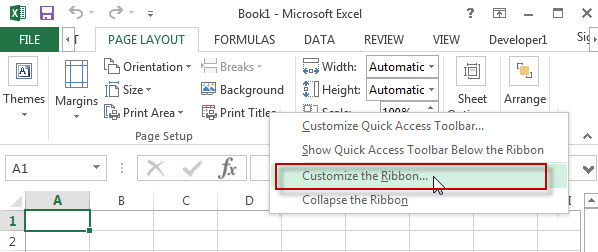
Step1# Right-click on any ribbon tab name or anywhere on the Ribbon , then click “Customize the Ribbon”.
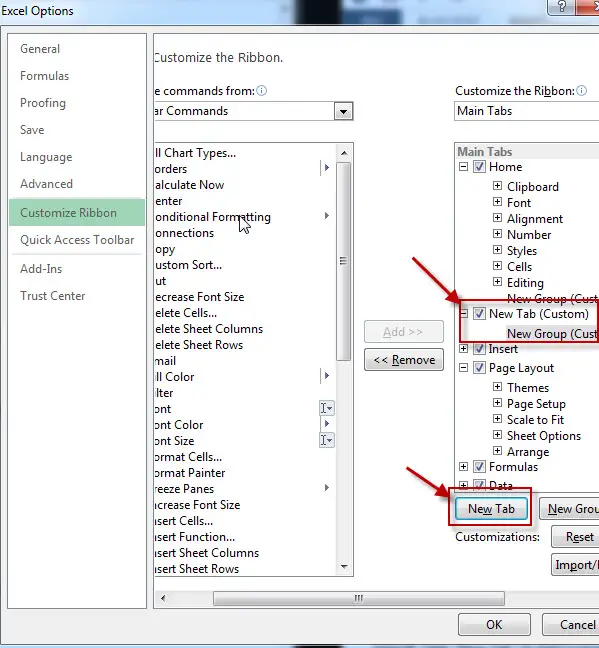
Step2# Click “New Tab” to Add a newly ribbon tab and custom ribbon group.
2. Rename ribbon tab
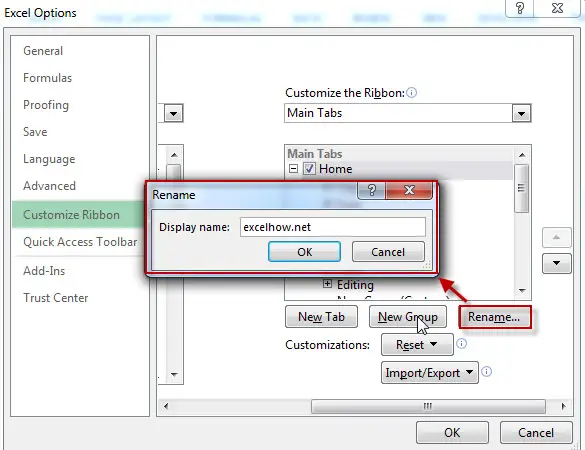
Step 1# click the tab you want to rename ribbon tab(default or custom tab or groups)
Step 2# then click “Rename”
Step 3# type the name you want to set.
3. Add Ribbon command to custom group
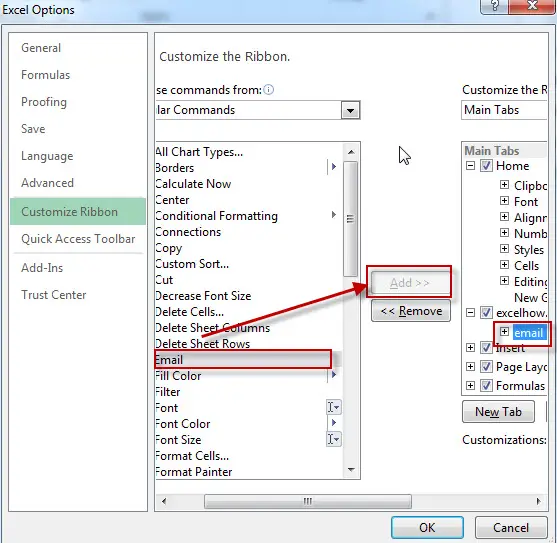
Step 1# click the custom group that you want to add a command
Step 2# then choose one command from the left command list
Step 3# next to click “Add” command.
4. Reset ribbon tabs to default
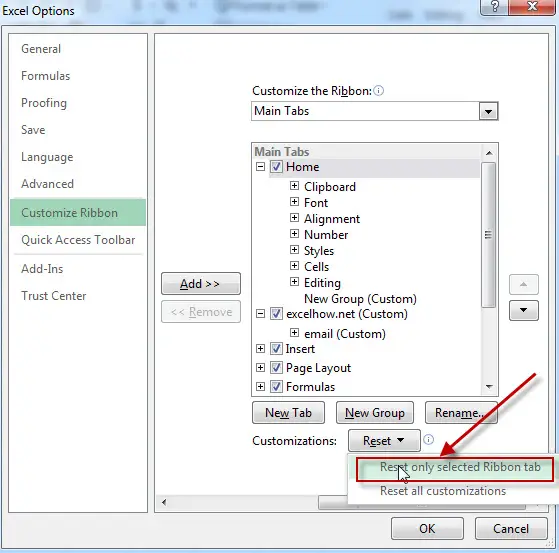
You can reset all Customizations or just reset only selected ribbon tab, just click “Reset” button then click “reset all customizations” or “reset only selected ribbon tab” .
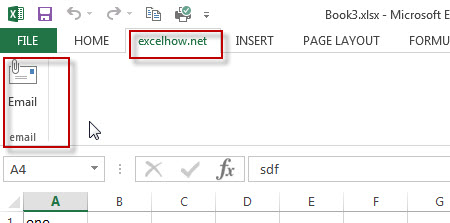
The below screenshot is the customized result for ribbon tab.
Customize quick access toolbar on ribbon
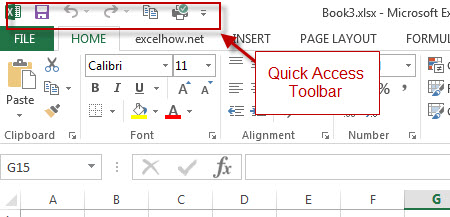
You can add the most frequently used command to Quick Access Toolbar. by default, the Quick Access Toolbar just contains three button: SAVE, Undo Typing and Redo typing. Now we will talk how to add a command to the Quick Access Toolbar.
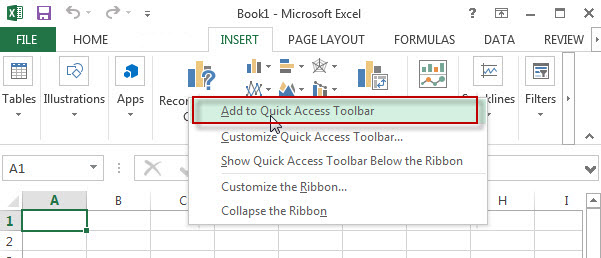
Step 1# Right-click the appropriate tab or group or everywhere place on ribbon, then click “Add to Quick Access Toolbar”
How to add a command to the Quick Access Toolbar that isn’t on the ribbon? See the below steps:
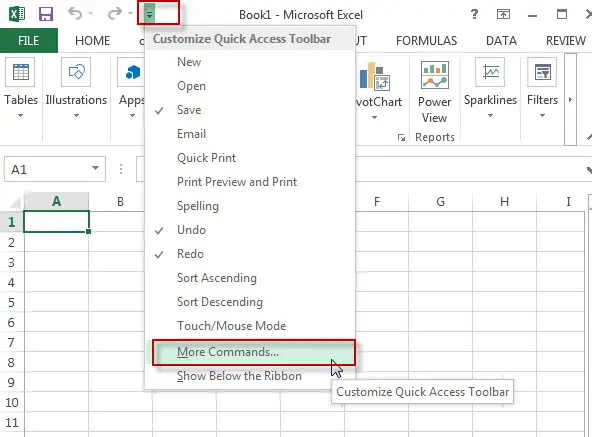
Step 1# click Customize the Quick Access Toolbar > More Commands.
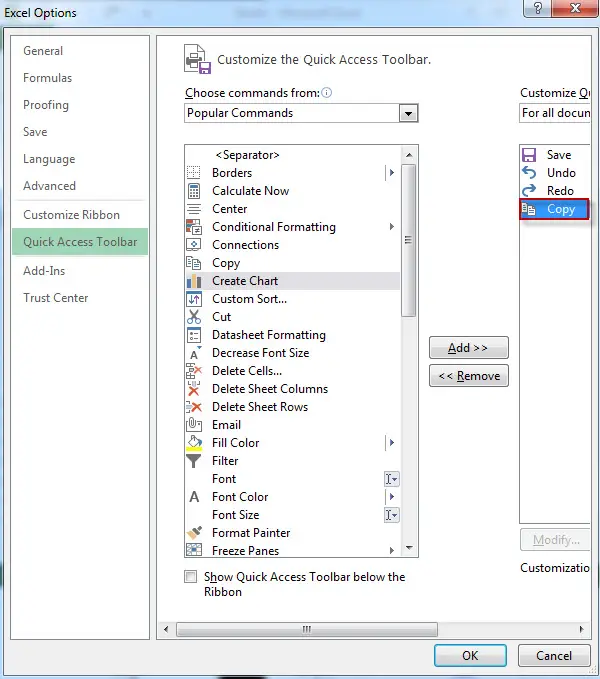
Step2# Select commands Not in the Quick Access Toolbar, then click “Add” button, then click “OK”.
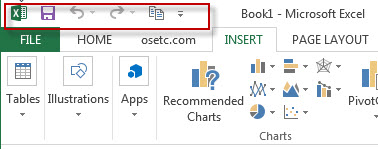
Last, see the result of add command to Quick Access Toolbar.
Add developer tab to ribbon
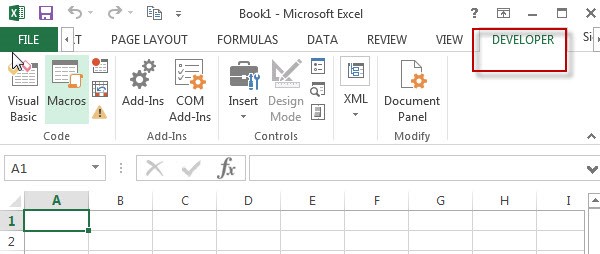
If you want to write macros, use XML commands/ActiveX controls… you need to add developer tab to ribbon, As the Developer tab is not displayed by default. To display developer Tab , just refer to the following steps:
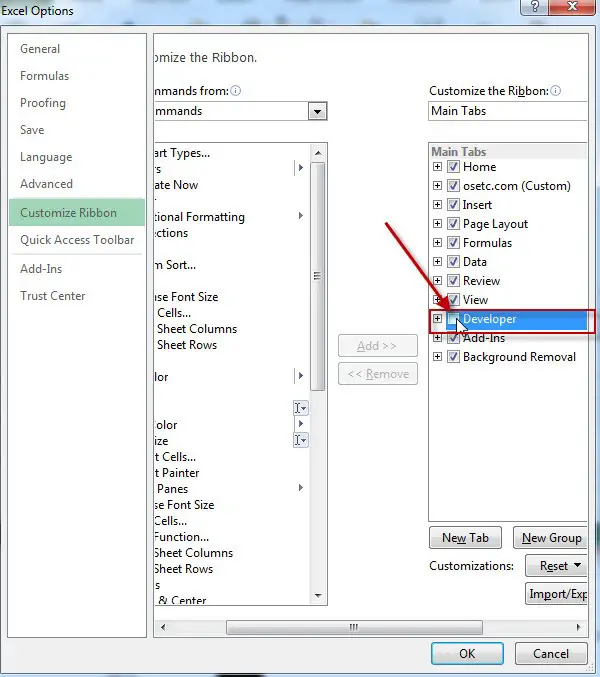
Step 1# Right-click any ribbon tabs or black space on the ribbon, then click “Customize the Ribbon…”

Step 2# check “Developer” tabs under “Customize the ribbon” list. Then click “ok” button.
Now let’s see the result:
Leave a Reply
You must be logged in to post a comment.