This post will guide you how to allow “Group/Ungroup” rows on a protected Worksheets in your Excel. How to group or ungroup rows in a worksheet in Excel 2013/2016.
Table of Contents
Group/Ungroup Rows
Assuming that you have lots of rows or columns and you want to group rows or columns or automatically created an outline to make your data easy to organize and declutter spreadsheets. You can use the below steps to group rows:
Step1: select a set of rows that you want to group together. Such as: Row1 to Row3.
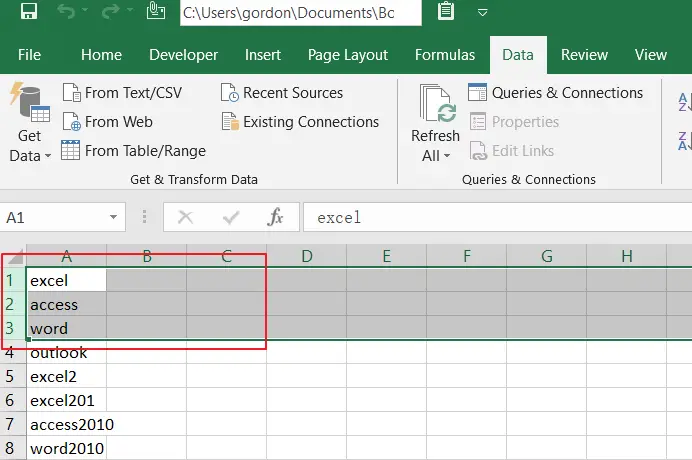
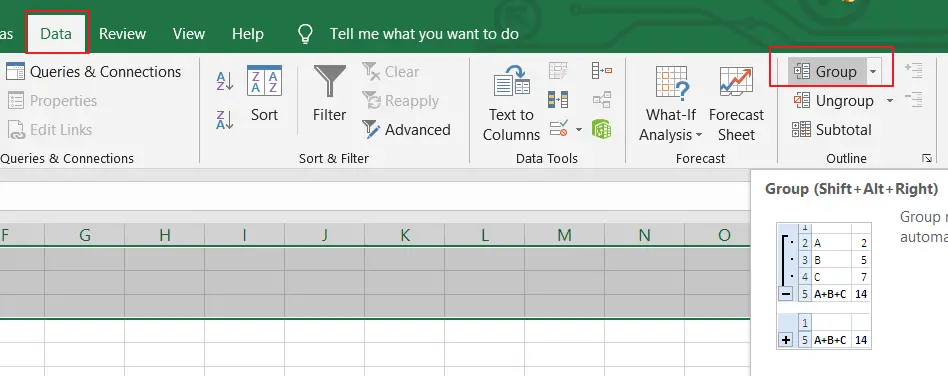
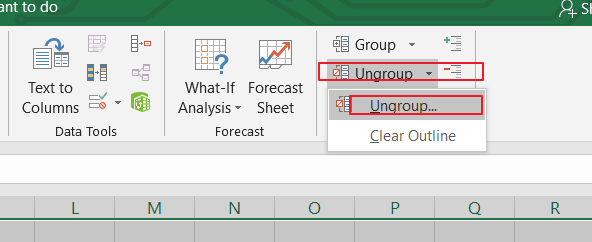
Step2: go to Data tab in the Ribbon, and click on the Group command under the Outline Group. And then select on Group… from the drop-down menu list.
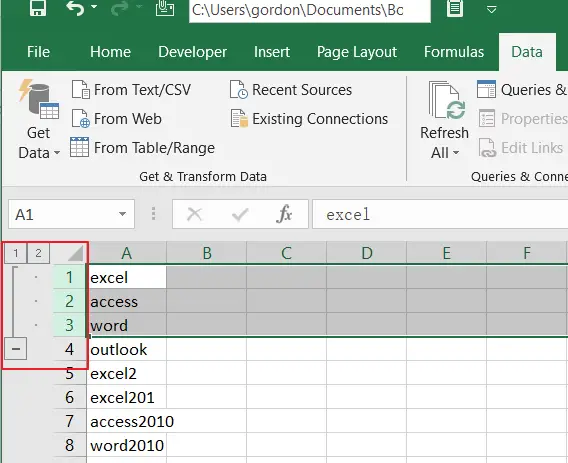
Step3: you should see that a set of dots next to each row would be created and a small box with a minus sign will be created and it can be used to expand the group.
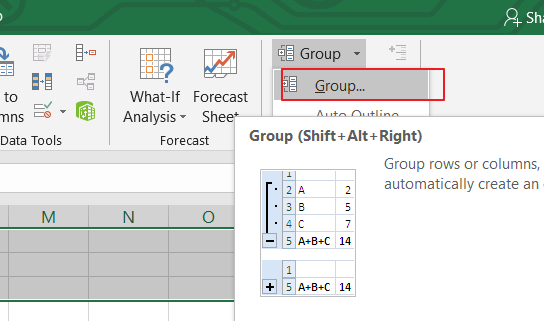
If you want to ungroup rows and you just need to select the groups that you want to ungroup, and then click on the Data tab, and then click on ungroup button located in the Outline Group, and click Ungroup…. From the drop-down menu list.
Allow Group on Protected Sheet
If you have grouped rows in your unprotected worksheet, and you can click on the minus sign(-) or plus sign (+) to collapse the group. And you are not allowed to click minus sign to collapse the group.

If there is a way to group rows in a protected worksheet. The below steps will show you how to use an VBA Macro to protect worksheet that allow you to group rows. Just do the following steps:
Step1: open your excel workbook and then click on “Visual Basic” command under DEVELOPER Tab, or just press “ALT+F11” shortcut.
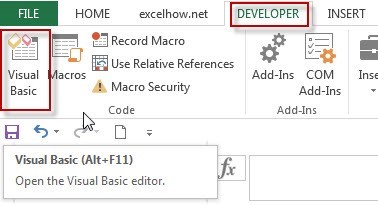
Step2: then the “Visual Basic Editor” window will appear.
Step3: click “Insert” ->”Module” to create a new module.
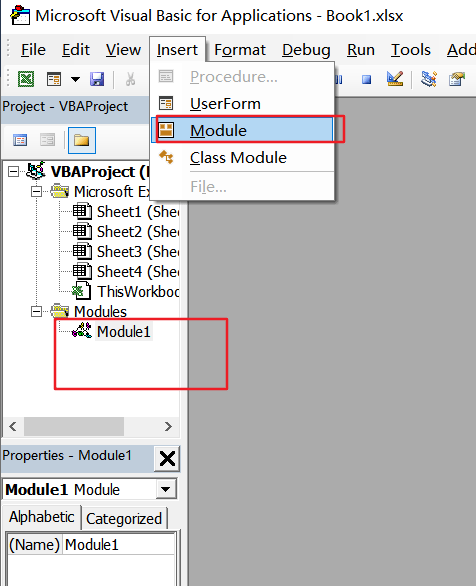
Step4: paste the below VBA code into the code window. Then clicking “Save” button.
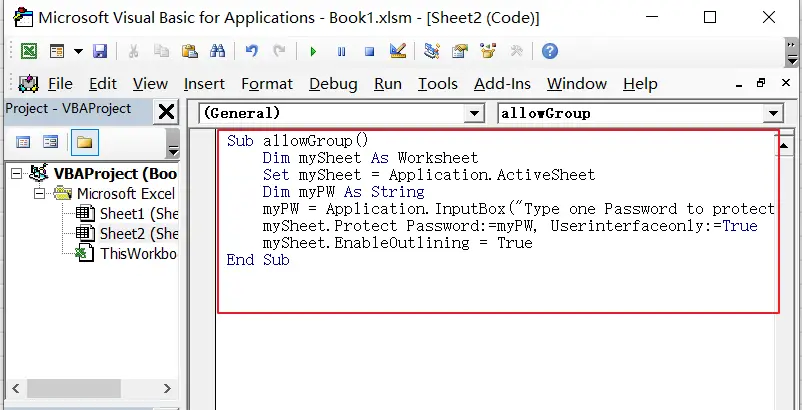
Sub allowGroup()
    Dim mySheet As Worksheet
    Set mySheet = Application.ActiveSheet
    Dim myPW As String
    myPW = Application.InputBox("Type one Password to protect your worksheet:", "allowGroup", "", Type:=2)
    mySheet.Protect Password:=myPW, Userinterfaceonly:=True
    mySheet.EnableOutlining = True
End Sub
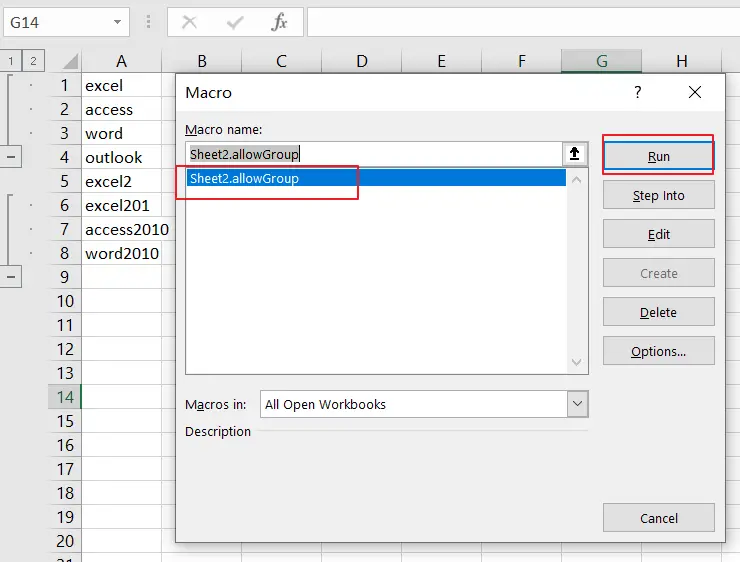
Step5: back to the current worksheet, click on Macros button under Code group. then click Run button.
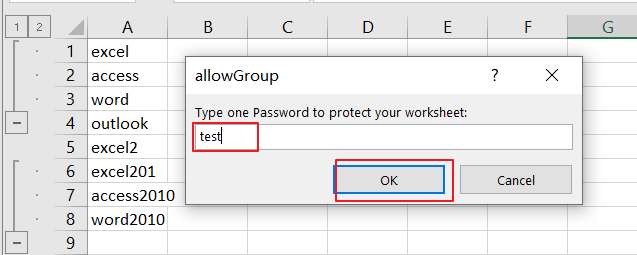
Step6: you need to type one password to protect your current worksheet, click on Ok button.
Step7: Now you can click on the minus sign(-) or plus sign (+) to collapse the group on your protected worksheet.
