This post will guide you how to change worksheet direction from default to right-to-left in your worksheet in Excel 2013/2016/2019/365. How do I change worksheet direction in Excel.
Table of Contents
1. Change Worksheet Direction
By default, the worksheet direction is from left to right. And if you want to change the direction from right to left in your current worksheet. How to do it. You can do the following steps:
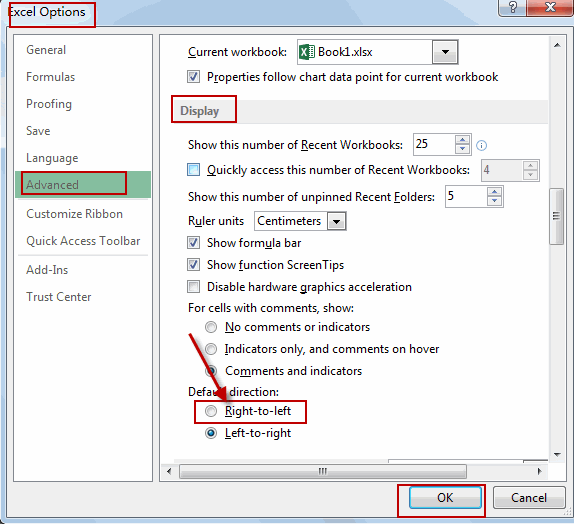
#1 click File tab, and select Options from the left menu list. And the Excel Options dialog will open.

#2 click Advanced menu in the Excel Options dialog, and scroll down to Display section, and check Right-to-left radio button under Default direction section.

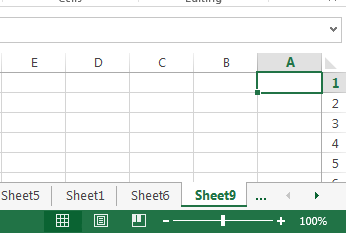
#3 click Ok button. Click “Add” button on the sheet tab to create a new worksheet. You would notice that the current worksheet direction has been changed to right-to-left.

Note: This method is only valid for the newly worksheet.
Now, the worksheet will be displayed in right-to-left direction, making it suitable for right-to-left languages like Arabic or Hebrew. The text, row numbers, and column letters will appear in the reverse order, ensuring proper alignment and readability for such languages.
2. Video: Change Worksheet Directon to Right-To-Left
This informative tutorial video, where we will demonstrate how to improve readability by changing the worksheet direction to right-to-left in Excel.
3. SAMPLE FIlES
Below are sample files in Microsoft Excel that you can download for reference if you wish.
Leave a Reply
You must be logged in to post a comment.