In our daily life, we often use some abbreviations (simple content) to express complex words or frequently used words in excel. It is convenient to use abbreviation during our work, but this expression is not very formal. If we want to create some formal forms, we need to replace these abbreviations with normal words. Though we can replace them by find and replace function, actually we can apply AutoText Entry function in excel to show words directly after entering abbreviations. This tutorial will introduce you the way to create AutoText and how to use them in excel.
Table of Contents
1. Create AutoText by AutoCorrection Function in Excel Options
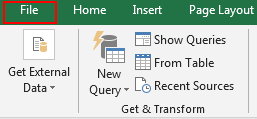
Step 1: Click File in the ribbon.

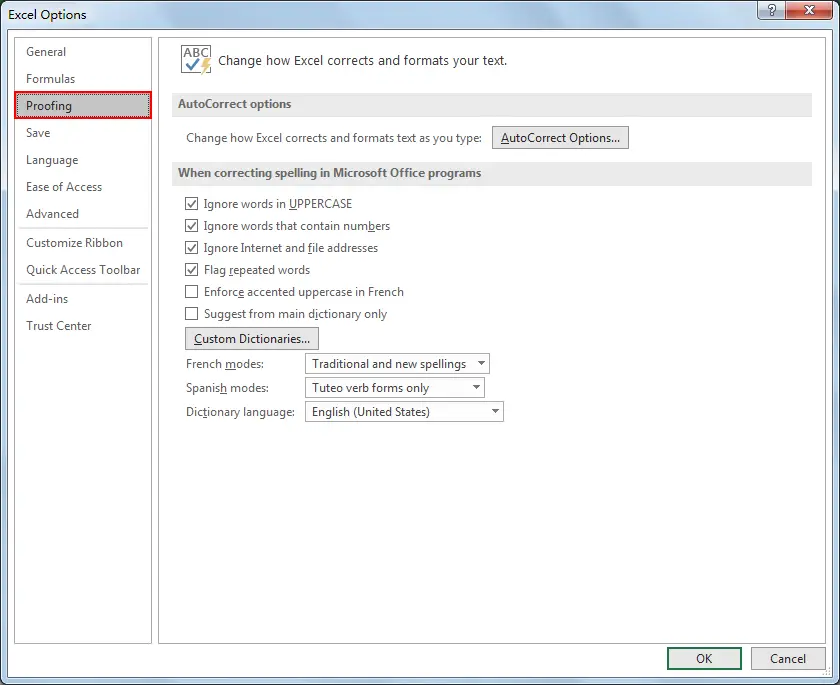
Then select Options to load Excel Options.

Step2: On Excel Options, click Proofing in the left panel.

Step3: Under AutoCorrect options, click AutoCorrect Options.

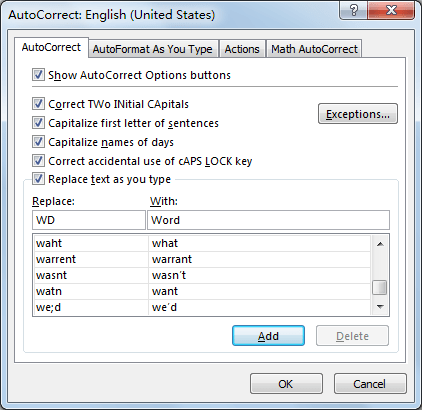
Step4: On AutoCorrection screen, under AutoCorrect tab, in Replace textbox enter your abbreviation (simple content) for example ‘WD’, in With textbox enter the normal word ‘Word’, then click Add, and click OK to complete this step.

Step5: After above step, system returns to Excel Options window, just click OK to quit this screen.
Step6: In opened spreadsheet, moves the cursor on any cell, enter ‘WD’ and then press Enter, verify that WD is changed to ‘Word’ automatically. Please be aware that in AutoCorrection case is sensitive for auto text entry, if you enter ‘wd’ instead of ‘WD’, it cannot convert to ‘Word’ after typing.
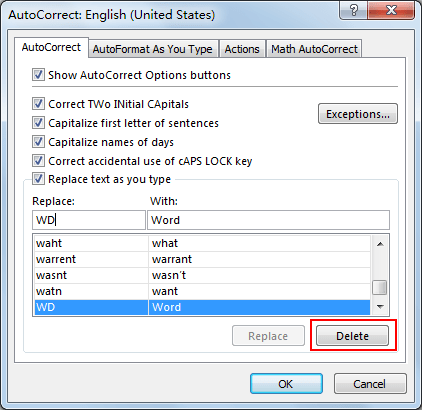
Step7: If you want to cancel auto correction, just enter ‘WD’ in Replace, and click Delete button to remove auto correction.

2. Video: Create AutoText by AutoCorrection Function
This tutorial video will show you how to to enable the AutoCorrect feature in Excel and use it to auto correct spelling errors or enter some frequently used words by typing in abbreviations.