This post will guide you how to remove all named ranges from your workbook in Excel. How do I quickly delete all named ranges with VBA in Excel 2013/2016.
Assuming that you have created lots of named ranges in your workbook, and you wish to delete all of them at once, how to do it. You can use an Excel VBA macro to accomplish it. And this post will show you two methods to remove all named ranges.
Table of Contents
1. Delete All Named Ranges
You can use Name Manager feature to delete all named ranges in your workbook, just see the following steps:
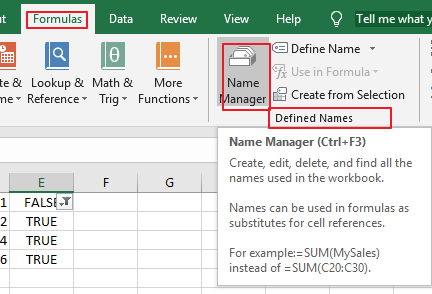
Step1: go to the Formulas tab, click Name Manager command under the Defined Names group. And the Name Manager dialog will open.
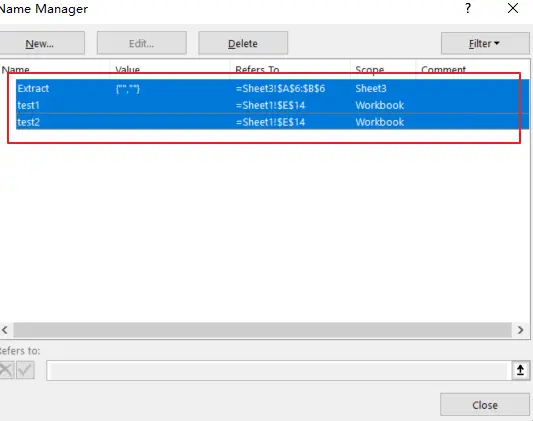
Step2: select the first name range in the Name Manager dialog box, and press Shift key to select the all the named ranges.
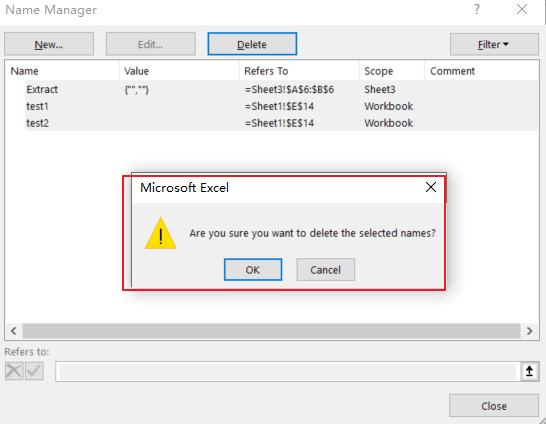
Step3: click Delete button at the top of the Name Manager dialog box, then a warning box will appear to ask you if you want to delete the selected names. Click Ok button. And all named ranges should be deleted at once.
2. Delete All Named Ranges with VBA
You can also use an Excel VBA Macro to remove all named ranges in a workbook. Just do the following steps:
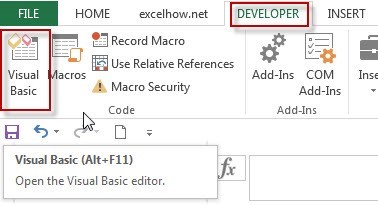
Step1: open your excel workbook and then click on “Visual Basic” command under DEVELOPER Tab, or just press “ALT+F11” shortcut.
Step2: then the “Visual Basic Editor” window will appear.
Step3: click “Insert” ->”Module” to create a new module.
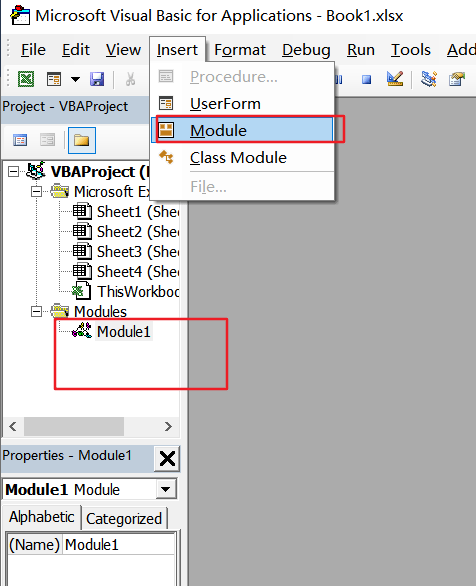
Step4: paste the below VBA code into the code window. Then clicking “Save” button.
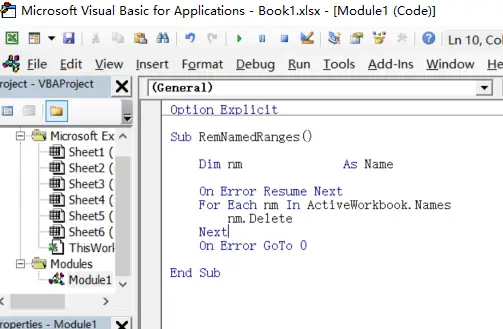
Option Explicit

Sub RemNamedRanges()
    Dim nm              As Name
    On Error Resume Next
    For Each nm In ActiveWorkbook.Names
        nm.Delete
    Next
    On Error GoTo 0

End Sub
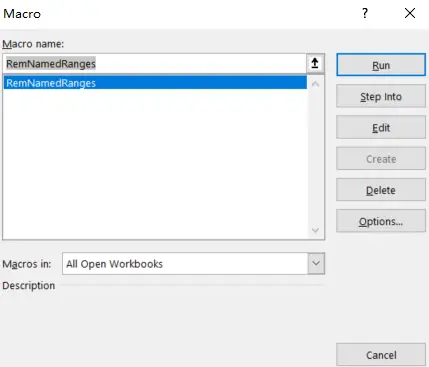
Step5: back to the current worksheet, then run the above excel macro. Click Run button.
3. Video: Delete All Named Ranges
This Excel video tutorial, we’ll explore two methods to delete all named ranges. We’ll start by using the Name Manager feature, followed by executing a VBA code.
Leave a Reply
You must be logged in to post a comment.