Excel can auto save workbook we just editing within certain interval, normally the interval is 10 minutes by default, and the copies will be saved in a specified location. In different situations, we may need to change the interval or AutoSave file location per different request, end we can even more disable the AutoSave function sometimes. This article will introduce you the method about changing AutoSave settings, you can resolve your questions after reading this article.
Table of Contents
Part 1: Change AutoSave Interval in Excel Options
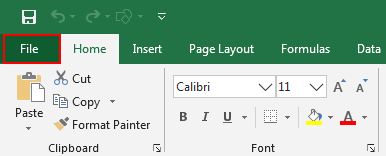
Step 1: Click File in ribbon on current worksheet.

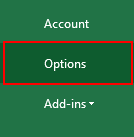
Step 2: After clicking File, in left panel, click Options to load Excel Options window.

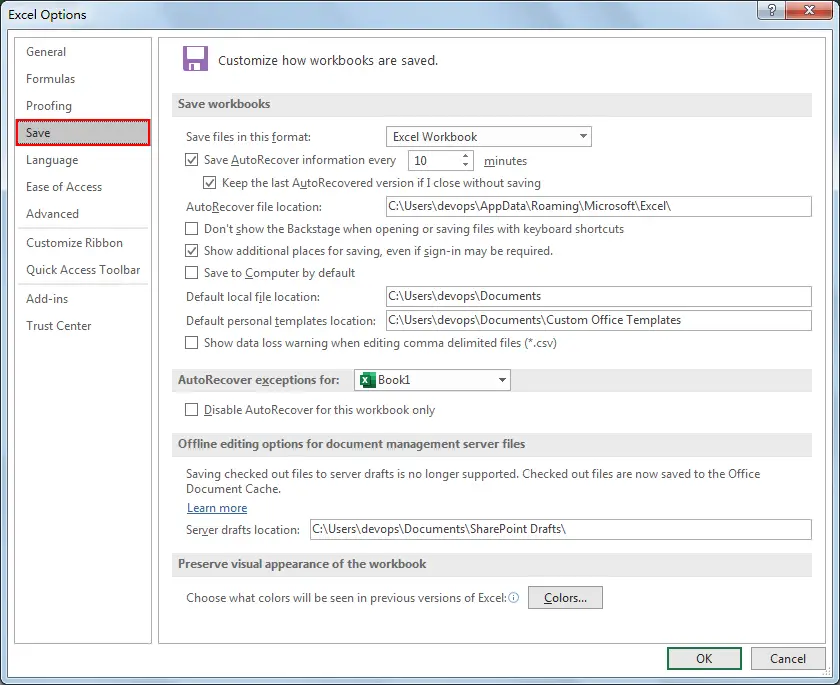
Step 3: Click Save, then all Save related settings are displayed.

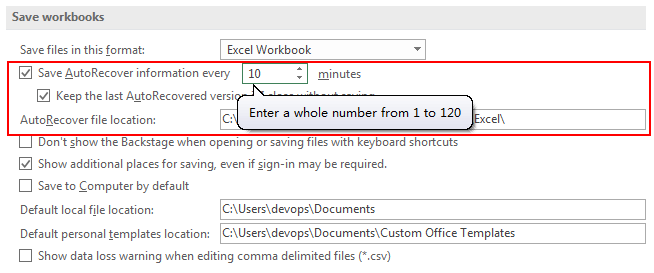
Step 4: In Save workbooks section ‘Save AutoRecover information every X minutes’, enter a whole number for example 15 or 20. You may notice that when moving cursor on the textbox, a floating message pops up to indicate user that only whole number 1 to 120 are acceptable.

Step 5: After changing the interval, click OK in the bottom. Then the new interval will take into effective.
Part 2: Change AutoSave File Location in Excel Options
Step 1: Repeat above steps#1-3.
Step 2: In Save workbooks section, you can find AutoRecover file location, type your new file location.

Step 3: Then click OK. Verify that default location is updated.
Part 3: Disable AutoSave File Function
Step 1: Repeat above steps#1-3.
Step 2: Uncheck ‘Save AutoRecover information every X minutes’ option.

Step 3: Then click OK. Then AutoSave function is disabled.