This post will provide you with a step-by-step guide on how to save Excel workbook file with Cell value in Excel using VBA code in Excel 2013/2016/2019/365. Saving files based on specific criteria can be a tedious and time-consuming task, especially if you have to do it repeatedly. However, with VBA code, you can automate this process and save yourself a lot of time and effort.
Table of Contents
1. Save File Based on Cell Value with VBA Code
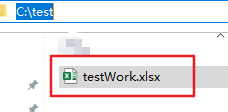
Assuming that you have a request that save the current workbook file I am working as the value in Cell A1. For example, the value of Cell A1 is testWork, and you want to save the workbook as the name of testWork.
To Save file with Cell Value in Excel, you need to write down an Excel VBA Macro to achieve the result. Just do the following steps:
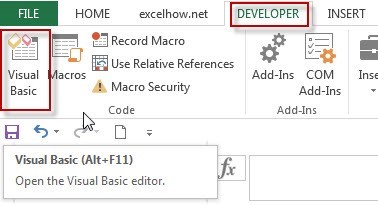
Step1: open your excel workbook and then click on “Visual Basic” command under DEVELOPER Tab, or just press “ALT+F11” shortcut.

Step2: then the “Visual Basic Editor” window will appear.
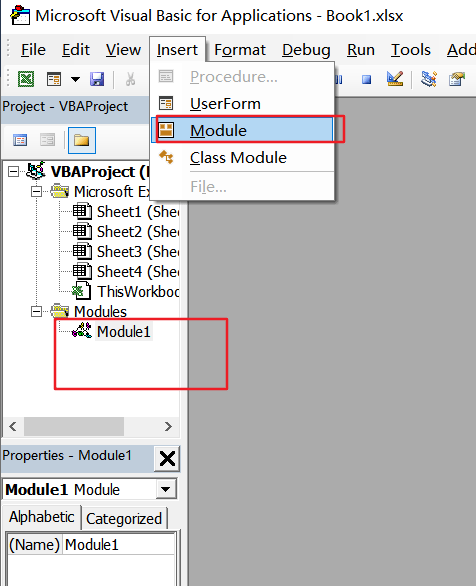
Step3: click “Insert” ->”Module” to create a new module.

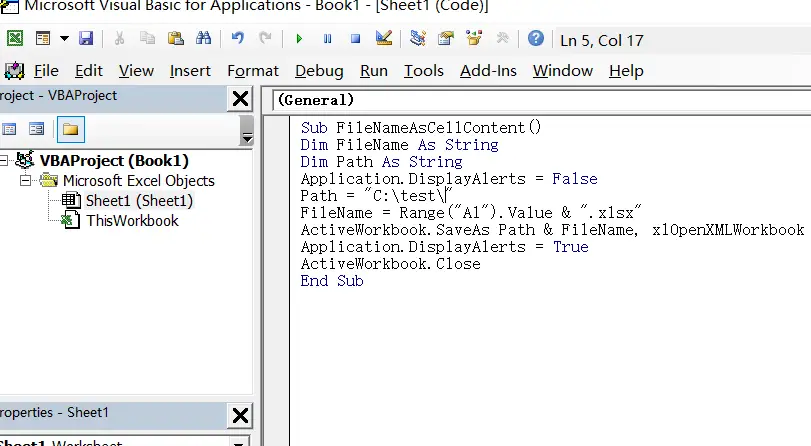
Step4: paste the below VBA code into the code window. Then clicking “Save” button.

Sub FileNameAsCellContent()
    Dim FileName As String
    Dim Path As String
    Application.DisplayAlerts = False
    Path = "C:\test\"
    FileName = Range("A1").Value & ".xlsx"
    ActiveWorkbook.SaveAs Path & FileName, xlOpenXMLWorkbook
    Application.DisplayAlerts = True
    ActiveWorkbook.Close
End Sub
Note: if you want to save workbook as other cell value, you just need to change A1 to other cells.
Step5: back to the current worksheet, then run the above excel macro. Click Run button.
Step6: Let’s see the result:

2. Video: Save File based on Cell Value in Excel
This video will demonstrate how to save a file based on a cell value in Excel using VBA code.
3. Conclusion
Now you should have a good understanding of how to use VBA code to save files based on cell values, and you’ll be able to apply this knowledge to your own Excel projects.
Leave a Reply
You must be logged in to post a comment.