Sometimes we need to split data from a long column into a table with several columns based on some criteria like X rows or X columns. If we split data by manual, it is very complex and troublesome. So, we need a simple way to split data into multiple columns. This article will introduce you two convenient ways to split data, one is by VBA script. And then after running macro, you can get a dialog to type your demands, then it can help you to split data automatically and correctly. The second way is by formula. This way is quite helpful for those users who are not skilled in coding. You can select one you like. Now let’s get started.
Prepare a long list in one column in excel. See example below. This is a list of names.

If we want to split them into 4 rows, we can follow below steps.
Table of Contents
1. Split Data into Multiple Columns by VBA in Excel
Step 1: On current visible worksheet, right click on sheet name tab to load Sheet management menu. Select View Code, Microsoft Visual Basic for Applications window pops up.
Or you can enter Microsoft Visual Basic for Applications window via Developer->Visual Basic.
Step 2: In Microsoft Visual Basic for Applications window, click Insert->Module, enter below code in Module1:
Sub SplitDataintoMultipleColumns()
    Dim rng As Range
    Dim InputRng As Range
    Dim OutputRng As Range
    Dim xRow As Integer
    Dim xCol As Integer
    Dim xArr As Variant
    Set InputRng = Application.Selection
    Set InputRng = Application.InputBox("Select Input Range :", "SplitDataintoMultipleColumns", InputRng.Address, Type:=8)
    xRow = Application.InputBox("Enter Row Number :", "SplitDataintoMultipleColumns")
    Set OutputRng = Application.InputBox("Select Output Range :", xTitleId, Type:=8)
    Set InputRng = InputRng.Columns(1)
    xCol = InputRng.Cells.Count / xRow
    ReDim xArr(1 To xRow, 1 To xCol + 1)
    For i = 0 To InputRng.Cells.Count - 1
        xValue = InputRng.Cells(i + 1)
        iRow = i Mod xRow
        iCol = VBA.Int(i / xRow)
        xArr(iRow + 1, iCol + 1) = xValue
    Next
    OutputRng.Resize(UBound(xArr, 1), UBound(xArr, 2)).Value = xArr
End Sub
Step 3: Save the codes, see screenshot below. And then quit Microsoft Visual Basic for Applications.
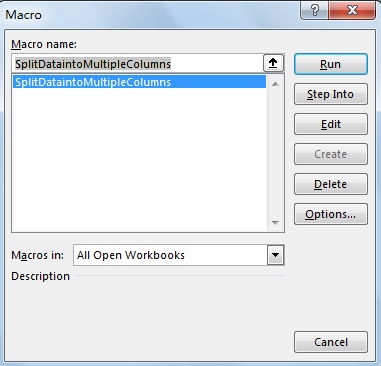
Step 4: Click Developer->Macros to run Macro. Select ‘SplitDataintoMultipleColumns’ and click Run.
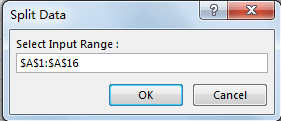
Step 5: Split Data dialog pops up. Enter Select Input Range $A$1:$A$16. Click OK. In this step you can select the long list range you want to do split.
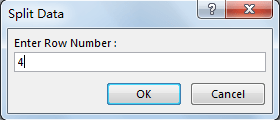
Step 6: Enter 4 into “Enter Row Number”. Click OK. In this step you can enter the row number per your demands.
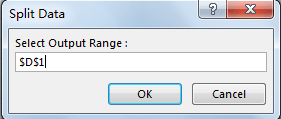
Step 7: On Split Data dialog, Enter Select Output Range $D$1. Click OK. Please be aware that you can select only one single cell is ok. In this case, we select D1 as output range, then split data will be listed in column D started from D1, as we entered row number as 4 in last step, so only D1 to D4 will save the split data, then left data will be listed in E column into 4 rows.
Step 8: Click OK. Verify that data is split to 4 rows properly.

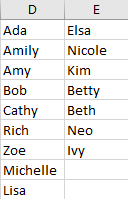
Step 9: You can also change row number to other value, table will be created per your input automatically. For example, enter row number as 9, you will get below table.
2. Split Data into Multiple Columns by Formula in Excel
This method is friendly to users who are not good at coding. Just copy the formula and use it.
Step 1: In C1 enter the formula
=INDEX($A:$A,ROWS($A$1:A1)+(COLUMNS($A$1:A1)-1)*4)
In this formula, 4 in (COLUMNS($A$1:A1)-1)*4) is the row number you want to split data into the new range. You can change to other value you like.

Step 2: Click Enter. Verify that value in A1 is listed in C1.

Step 3: Drag the fill handle to row 4 and then across to other columns like D, E, F. Verify that data is split to 4 rows properly.

Step 4: Change 4 rows to 5 rows and check again. Verify that data is split to 5 rows properly, for the cells without value, 0 displays.

3. Video: Split Data into Multiple Columns
This Excel video tutorial, we’ll explore two methods to split data in a long column into multiple columns. We’ll start by utilizing a formula based on the INDEX and COLUMNS functions, followed by a VBA code approach.